Loco Translate is a powerful plugin that enables WordPress users to easily translate their themes and plugins. In this article, we will guide you step-by-step on how to translate PixMagix using the Loco Translate plugin.

Step 1: Install and Activate Loco Translate
Before we can start translating PixMagix, we need to install and activate the Loco Translate plugin in WordPress. Head over to the WordPress plugin repository, search for “Loco Translate”, and click on the “Install” button. Once installed, activate the plugin.
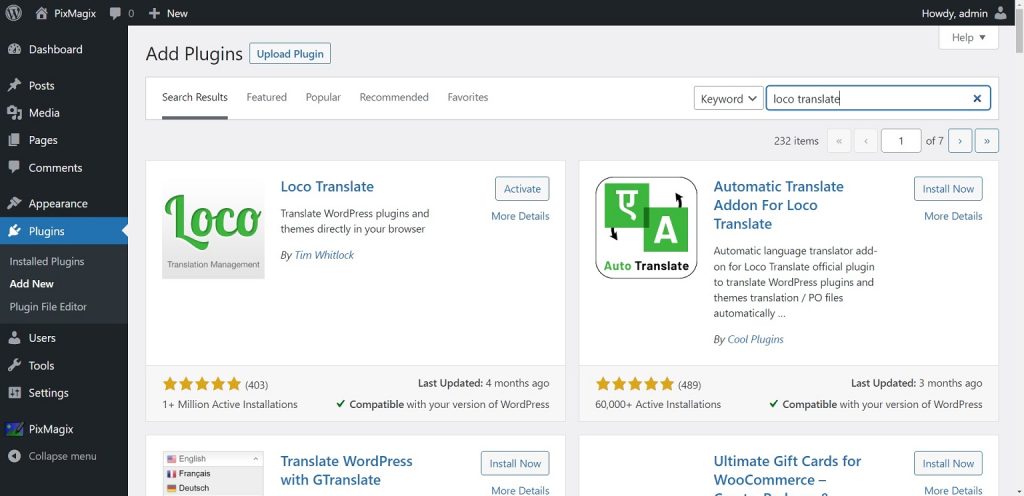
Step 2: Select PixMagix and Click on Translate
Now that Loco Translate is active, go to your WordPress dashboard and navigate to the “Plugins” list. Look for PixMagix in the list, and click on the “Translate” link displayed below it.
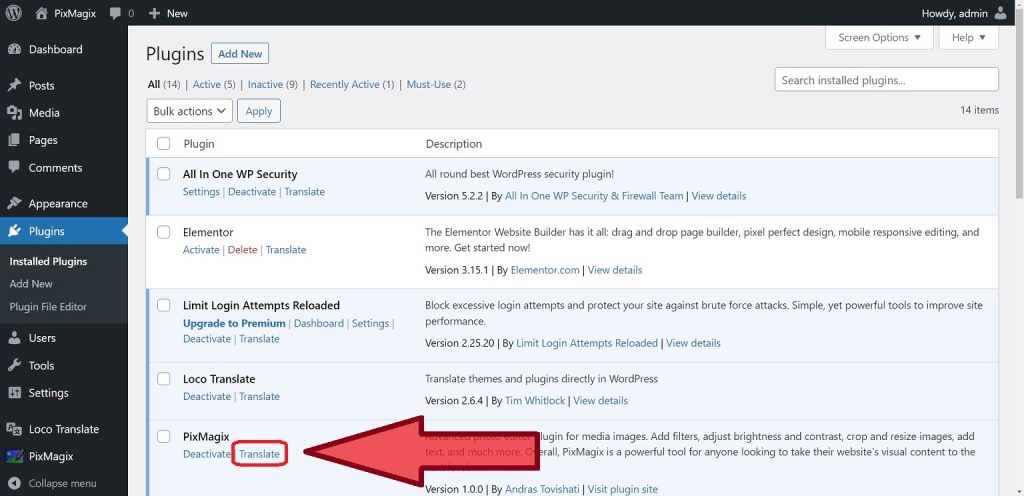
Step 3: Add New Language and Configure Translation Settings
In the Loco Translate interface for PixMagix, you will see an option to add a new language. Choose the desired language from the list provided. Next, you need to specify where the translation files will be saved. We recommend selecting the “Author” location, but you can also choose the “Custom system” option if preferred. Once you have made your selections, click on the “Start Translating” button.
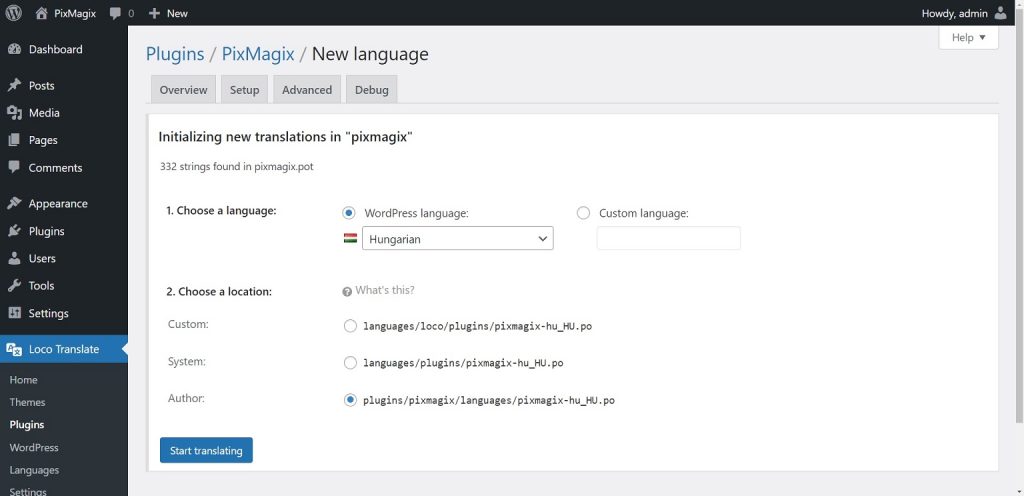
Step 4: Translate the Strings
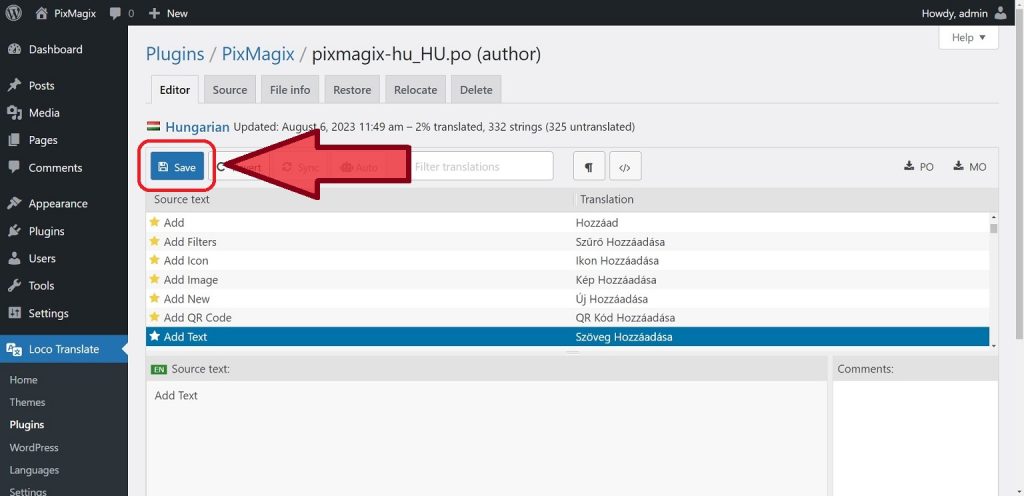
You will now be directed to the translation interface, where you can begin translating the strings in PixMagix. To start translating, click on a string and enter the translated text in the translation field. Repeat this process for all strings that require translation.
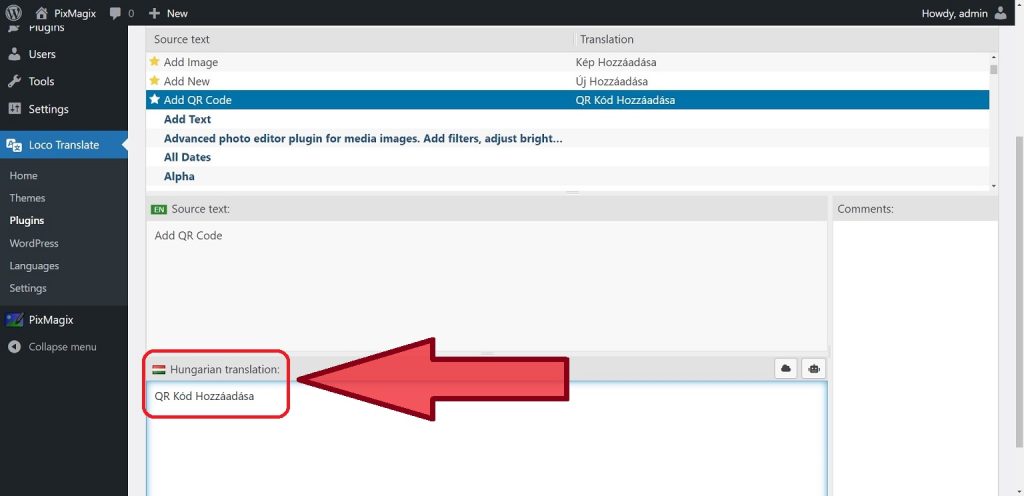
Step 5: Save and Export the Translation
After you have finished translating the necessary strings, click on the “Save” button to save your translation.
That’s it! You have successfully translated PixMagix using the Loco Translate plugin.
Conclusion
Loco Translate is an essential tool for translating WordPress themes and plugins. By following the easy steps outlined in this article, you can make your PixMagix plugin accessible to a wider audience.
